So, you want a year-round greenhouse? Time to dig deep—literally.
One of the most important decisions in any greenhouse project is the foundation design. The foundation determines how stable the structure will be, how efficiently it retains heat, and how well it integrates with systems like GAHT® (Ground-to-Air Heat Transfer) that allow a greenhouse to regulate temperature naturally.
A properly designed greenhouse foundation and floor supports the structure, protects against frost movement, allows for insulation, and ensures compatibility with advanced climate systems. Whether you’re planning a passive solar greenhouse, commercial growing facility, or backyard greenhouse, understanding your foundation options will help you avoid costly mistakes and build a greenhouse that performs for decades.
In this guide, we’ll cover:
- The most common greenhouse foundation types
- How frost depth affects greenhouse footings
- Whether you can use an existing foundation
- The pros and cons of greenhouse flooring options
- How foundations interact with GAHT® climate battery systems
Before starting any greenhouse foundation, it’s always wise to consult with a structural engineer and greenhouse designer. If your greenhouse requires permits, a stamped foundation plan may also be required. At Ceres, we offer consulting and optional foundation plans as part of our solar greenhouse design and installation packages.
What Is the Best Foundation for a Greenhouse?
The most robust greenhouse foundation is a continuous footing with a perimeter stem wall (often called a footer and foundation wall). This design distributes the greenhouse load evenly into the ground and provides a durable structural base.
Key advantages include:
Structural Stability
A full perimeter footing prevents shifting or settling over time and supports the structural loads of the greenhouse frame.
Foundation Insulation
The wall allows insulation to be installed along the foundation perimeter, improving energy efficiency and reducing heat loss—especially important in cold-climate solar greenhouses.
Rodent Protection
A continuous wall helps prevent rodents and pests from burrowing into the greenhouse.
Precise Structural Alignment
Greenhouse frames require exact anchor placement. A purpose-built foundation ensures the structure sits correctly and safely.
However, depending on the greenhouse size, site conditions, and budget, several foundation types may work well. Below are the four most common greenhouse foundation options, ranging from simplest to most complex.
Option 1: No Foundation (Ground-Level Installation)
For very small greenhouses, it may be possible to install the structure directly on the ground. We typically only recommend this approach for small solar greenhouses around 200 square feet or less. Even without a formal foundation, several steps are important for durability:
- Create a Level Base. Place the greenhouse on a level surface, usually cinder blocks, bricks or gravel in order to create a level base and floor inside.
- Install Earth Anchors. Earth anchors add protection against strong winds. These steel anchors are driven into the ground and attached to the greenhouse base frame with cables.
- Add Perimeter Insulation. Even when no traditional foundation is used, we typically install insulation around the perimeter using the Swedish Skirt method. This reduces heat loss and allows the greenhouse to take advantage of the thermal mass of the soil below.
*This insulation is particularly important for greenhouses using a GAHT® system, which stores heat underground.
While this approach can work for small hobby structures, larger or year-round greenhouses typically require a more substantial foundation.
Option 2: Concrete Pier Foundations
Concrete piers are a common and relatively simple greenhouse foundation method. They consist of concrete tubes buried below the frost line, spaced around the perimeter of the greenhouse.
Installing Concrete Piers
If you’re installing concrete piers using an auger, begin by laying out the footprint of the greenhouse directly on the ground. An auger—typically 8″ or 10″ in diameter—is used to drill holes at least 4 feet deep, ensuring the piers extend below the frost line so they remain stable through winter freeze cycles.
Next, place cardboard concrete form tubes into the holes and fill them with concrete. It’s helpful to allow some of the concrete to spread slightly below the bottom of the tube to create a wider base or anchor for added stability. As the concrete is poured, be sure the tops of all the piers are perfectly level from tube to tube, since the greenhouse base frame will sit directly on these points.
Once the piers have settled and the foundation is set, you can insulate the perimeter using the Swedish Skirt method. As mentioned earlier, this insulation step is important for reducing heat loss and improving the overall energy performance of the greenhouse, helping it operate efficiently year-round.

Excavating the Full Footprint
Another option is to excavate the entire greenhouse footprint to a depth of about four feet and install the piers around the perimeter. This method typically requires a backhoe or mini-excavator but offers additional flexibility during installation. The process generally includes the following steps:
- Excavate the greenhouse footprint plus an additional 8 inches around the perimeter to allow space for the 4 inches of foam insulation surrounding the foundation.
- Place the cardboard pier tubes in their designated locations and temporarily connect them with a simple 2×4 frame to hold them in place while the concrete is poured. This temporary frame will be removed before backfilling.
- Fill the tubes with concrete, ensuring the tops are level across all piers. Once poured, install the greenhouse base frame and connect it to the tops of the piers to help stabilize the structure during backfilling.
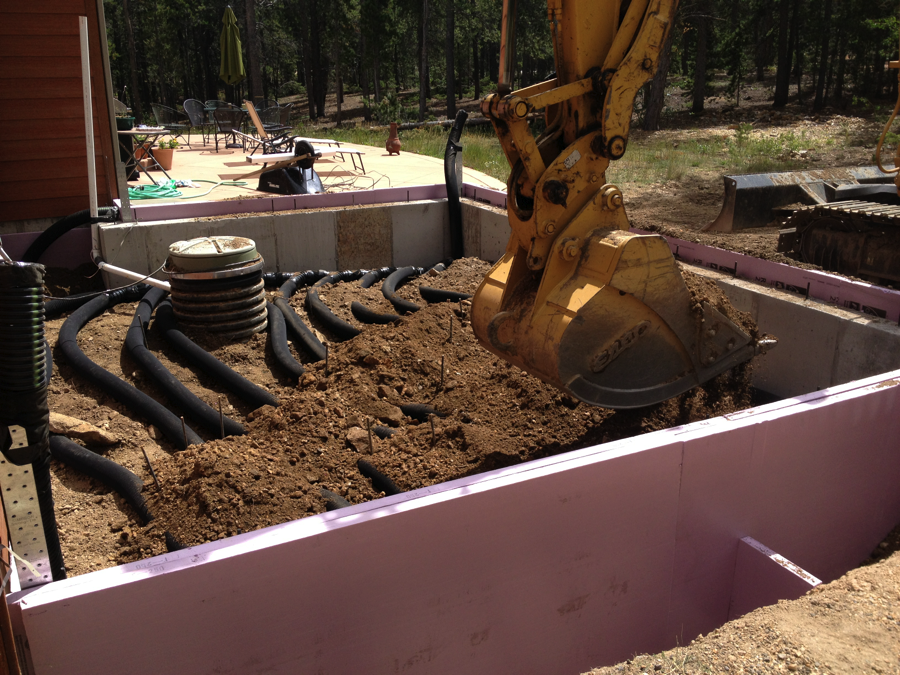
- Install perimeter insulation and, if included in the design, the GAHT® (Ground-to-Air Heat Transfer) system at this stage. Carefully backfill the excavated area once these components are in place.
Excavating the entire footprint offers an additional advantage: it allows underground insulation and the GAHT® heating and cooling system to be installed simultaneously, improving the greenhouse’s long-term thermal performance.
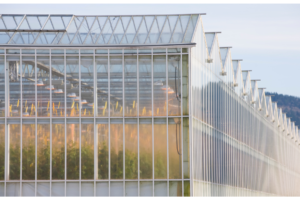
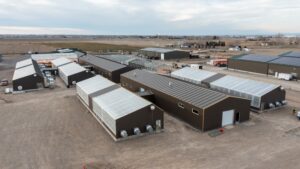
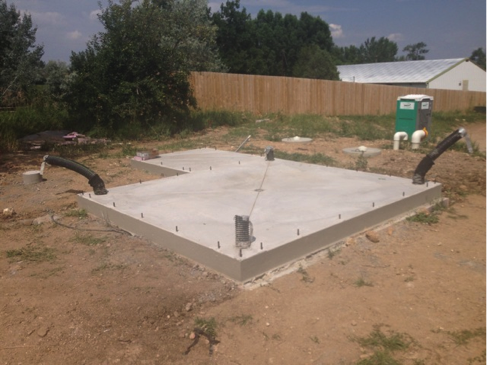
Option 3: Concrete Slab Foundations
Concrete slabs are widely used in commercial greenhouse construction and provide a clean, durable flooring surface. They are particularly common in aquaponic systems, research facilities, and production greenhouses where a level working surface is required.
Advantages of Concrete Greenhouse Floors
Concrete slabs offer several benefits:
- Extremely durable
- Supports carts and machinery
- Easy to clean and sanitize
- Allows installation of floor drains
- Supports rolling benches
- Adds thermal mass to stabilize temperature
Thermal mass helps regulate temperature by absorbing heat during the day and releasing it at night.
Important Design Considerations for a Greenhouse Slab
One of the most important considerations when pouring a slab for a greenhouse is proper drainage. Floor drains should be installed at regular intervals to prevent water from pooling inside the structure. Adding a slight slope to the slab helps guide excess water toward the drains, improving water management and keeping the greenhouse floor usable and safe.
Most greenhouse slabs are poured on grade, meaning they are placed directly on the existing soil after it has been leveled and prepared. Depending on the site conditions, some excavation may be required to create a level base. If the greenhouse is being built into a hillside, the slab can also be installed in combination with a retaining wall to create a stable, level footprint. Otherwise, a standard level site is typically sufficient.
In many cases, slabs are constructed with a thickened edge, where the perimeter of the slab is thicker—often around 12 inches or more—while the interior slab remains about 4 to 5 inches thick. The slab is reinforced with rebar to increase strength and durability. During the pour, J-bolts are embedded in the concrete so the greenhouse structure can be securely anchored to the slab once construction begins.
If a GAHT® (Ground-to-Air Heat Transfer) system will be installed beneath the greenhouse, the process requires additional preparation. The greenhouse footprint must first be excavated so the GAHT® piping network and vertical insulation can be installed below grade. After installation, the area is carefully backfilled to the surface.
Because any foundation relies on stable, undisturbed soil, the excavated area should be watered and allowed to settle for several days or even weeks before pouring the slab. This helps ensure the soil compacts naturally and provides a solid base for the concrete.
Once the slab has been poured and cured, the greenhouse structure can be assembled on top and secured to the embedded J-bolts, creating a stable and long-lasting foundation for the greenhouse.
Installing GAHT® Under a Slab
If a GAHT® (Ground-to-Air Heat Transfer) system will be installed beneath the greenhouse, the process requires additional preparation. The greenhouse footprint must first be excavated so the GAHT® piping network and vertical insulation can be installed below grade. After installation, the area is carefully backfilled to the surface.
The best soil to use as a backfill for the GAHT® system is a loamy soil. Typically, the native soil is good for backfill because it is the most practical and cost-effective. From a performance perspective, a fine-grade gravel is slightly better because of the higher heat capacity and higher conductivity. Sand or large rocks should not be used as those can create air pockets in the system.
Because any foundation relies on stable, undisturbed soil, the excavated area should be watered and allowed to settle for several days or even weeks before pouring the slab. This helps ensure the soil compacts naturally and provides a solid base for the concrete.
Once the slab has been poured and cured, the greenhouse structure can be assembled on top and secured to the embedded J-bolts, creating a stable and long-lasting foundation for the greenhouse.
Option 4: Footer and Foundation Wall
This is the most robust foundation option we commonly use for greenhouses. It involves pouring a continuous concrete wall around the perimeter of the greenhouse, typically extending about 4 feet below grade—or deeper, depending on the local frost line. Foundation walls are among the most stable and durable foundation systems and are widely used in residential and commercial construction.
Installing a Greenhouse Foundation Wall
To construct a foundation wall, the first step is to excavate a perimeter trench deep enough to extend below the frost line. This excavation is usually done with a backhoe or excavator.
Next, a reinforced concrete footer is poured at the base of the trench. Rebar is placed within the footer to strengthen the concrete, with vertical pieces of rebar extending upward to tie into the future foundation wall.
After the footer has cured sufficiently—typically after a few days—concrete forms are installed and the foundation wall is poured up to grade level. Once the wall has cured, the forms are removed.
At this stage, insulation is typically installed along the exterior of the foundation wall to improve energy efficiency and reduce heat loss from the greenhouse. The trench is then carefully backfilled, completing the foundation and creating a strong, stable base for the greenhouse structure.
This method provides:
- Maximum structural stability
- Excellent insulation potential
- Strong rodent protection
- Long-term durability
For large commercial or year-round solar greenhouses, this is often the preferred option.
Why Frost Depth Matters for Greenhouse Foundations
One of the most important factors in foundation design is local frost depth. Footings must extend below the frost line to prevent frost heave.
What Is Frost Heave?
When soil freezes, water inside the soil expands. This expansion can push foundations upward if the footing sits within the freezing zone.
Over time, repeated freeze-thaw cycles can crack concrete, shift structural alignment and damage greenhouse framing. Installing footings below frost depth prevents these issues.
Determining Frost Depth
Frost depth can be determined by examining local building codes, regional frost maps, soil reports, and structural engineering calculations.
In colder climates, frost depths often range from 30 inches to over 60 inches.
Can You Build a Greenhouse on an Existing Foundation?
In most cases, reusing an existing foundation is not recommended. While it may seem like a cost-saving option, existing foundations often create problems.
Structural Alignment
Greenhouses are engineered with precise anchor locations. Existing slabs rarely match these dimensions exactly.
Even small discrepancies can affect structural stability, load distribution, door placement, and glazing alignment.
Ventilation and Door Layout
Greenhouses require precise placement of vents and doors. An existing slab can interfere with these design requirements.
GAHT® Compatibility
If the greenhouse includes a GAHT® system, underground ducting must be installed beneath the floor. Existing slabs typically prevent this.
In some cases, if an existing greenhouse already exists, designers may be able to install an external GAHT® system adjacent to the structure. For new builds, however, a purpose-built foundation remains the best option.
Greenhouse Flooring Options
Once the foundation is determined, the next decision is greenhouse flooring. The best floor depends on your growing system, equipment needs, and greenhouse layout.
Concrete Floors
Concrete is one of the most durable flooring choices for greenhouses, particularly for commercial operations.
Benefits of concrete greenhouse flooring
- Highly durable
- Supports heavy equipment
- Easy to clean and sanitize
- Allows installation of floor drains
- Supports rolling benches and carts
- Adds thermal mass for temperature stability
Thermal mass from concrete can help stabilize temperatures by absorbing heat during the day and releasing it at night. Because of these benefits, concrete flooring is common in large production greenhouses and research facilities.
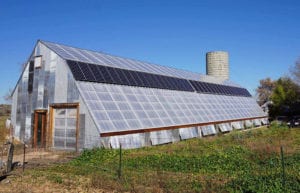
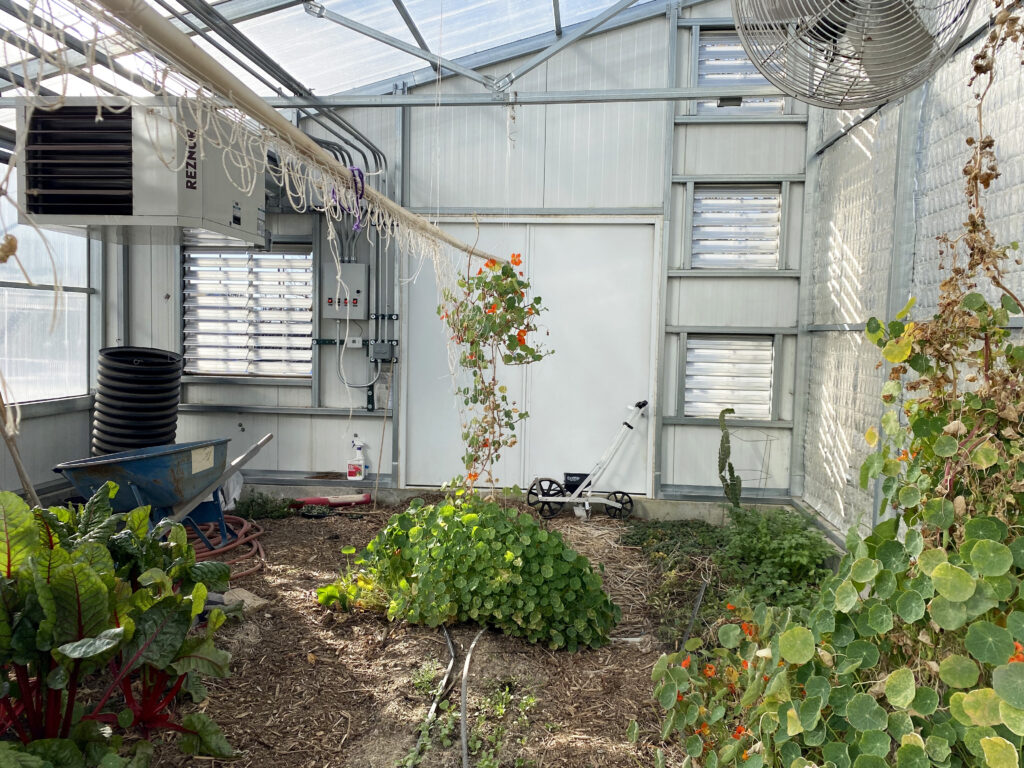
Soil Greenhouse Floors
Many growers prefer soil floors, especially in passive solar or regenerative growing systems. With a soil floor, plants can grow directly in the ground, rather than in containers or raised beds.
Advantages include:
- Direct access to natural soil nutrients
- Ability to grow larger crops such as fruit trees
- Improved soil biology
- Flexible growing layouts
This approach is often used in year-round passive solar greenhouses designed for food production. However, soil floors may not be ideal for operations that require carts, machinery, or strict sanitation protocols.
Soil floors are often better for: permaculture systems, fruit tree cultivation.
Gravel Greenhouse Floors
Gravel floors provide:
- Good drainage
- Lower installation cost
- Simple installation
- Reduced standing water
However, gravel floors can make it difficult to move carts or equipment smoothly. They are typically used in smaller greenhouses or hobby operations.
Paver Greenhouse Floors
Pavers provide a compromise between concrete and gravel.
Benefits include:
- Stable walking surface
- Good drainage
- Attractive appearance
- Easier installation than poured concrete
They are often used in hybrid greenhouse spaces that include both growing and work areas.
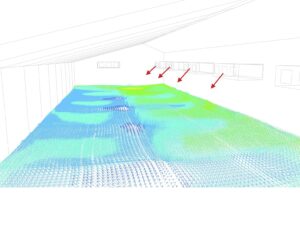
How GAHT® Systems Affect Greenhouse Foundations
The GAHT® (Ground-to-Air Heat Transfer) system uses the soil beneath the greenhouse as a thermal battery.
The system works by:
- Collecting warm greenhouse air during the day
- Moving that air through underground pipes
- Storing heat in the soil
- Releasing the heat back into the greenhouse at night
Because GAHT® relies on underground thermal mass, the foundation and flooring design must allow space for the system beneath the greenhouse floor.
This is one reason why proper excavation and foundation planning are essential.
Designing a Greenhouse Foundation for Long-Term Performance
A greenhouse foundation does far more than support the structure. It plays a critical role in energy efficiency, climate control, and durability.
When planning a greenhouse foundation, consider:
- Local frost depth
- Soil conditions
- Greenhouse size and wind loads
- Structural alignment with the greenhouse frame
- Flooring needs based on growing goals
- Compatibility with GAHT® or other climate systems
If the goal of your greenhouse project is to perform to a set of expectations, it’s worth investing the time—and sometimes a bit more budget—into proper design from the beginning. Thoughtful planning helps avoid costly changes during construction and leads to better long-term performance.
Key Takeaways: Greenhouse Foundations
If you’re planning a greenhouse build, remember these principles:
✔ Install footings below frost depth
✔ Choose a foundation based on greenhouse size and site conditions
✔ Use insulation to improve energy efficiency
✔ Select flooring based on growing goals and equipment needs
✔ If installing a GAHT® system, design the foundation to support the system
Getting the foundation right from the start ensures your greenhouse will be stable, energy-efficient, and productive for years to come.
If you have questions about foundation design or greenhouse construction, feel free to reach out—we’re always happy to help.